
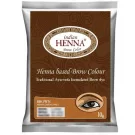
This product is a powder, so each use starts by mixing a small amount with a liquid (commonly water) to make a smooth paste. Because the powder is not pre-mixed, you can prepare only as much as your brows need, which also reduces waste and keeps the remaining powder dry between applications.
Typical application steps:
- Remove makeup and cleanse the brow area so the skin and hairs are free of oil.
- Prepare a small amount of paste according to the instructions on the package. The consistency should be thick enough to stay where you put it and not drip toward the eyes.
- Use a thin angled brush or a clean mascara/eyeliner brush to outline the lower edge of the brow first, then fill the inner area with short strokes in the direction of hair growth. Precision here is what creates a natural-looking shape.
- Leave the paste on for the time you have chosen — a shorter application gives a softer, more transparent result; a longer application deepens the colour and makes the shape more defined or graphic.
- Remove the paste gently with damp cotton or a cloth. Rinse the area with clean water and pat dry.
Avoid contact with the eyes during application and removal. Do not use on irritated, broken or damaged skin. If you are not sure how your skin will react, do a patch test on a small area (for example behind the ear or on the inner arm) at least 24 hours before tinting your brows, and only proceed if there is no redness, itching or swelling. If you are pregnant, breastfeeding, have a chronic skin condition or are on medication, check with a specialist before using any tinting product.
The powder tint binds to the outer layer of the brow hairs and can also lightly colour the skin underneath, which is why the result can look either like a subtle enhancement or a full, drawn-on brow, depending on how carefully you define the shape and how long you leave it on.